Candle making is an age-old craft that brings warmth, light, and ambiance into our lives. It’s a hobby that’s not just about creating something beautiful, but also about indulging in a therapeutic process that soothes the soul. While traditional cotton wicks have their charm, there’s something undeniably rustic and modern about using wooden wicks. They add a unique touch to your candles, creating a subtle crackling sound as they burn, much like a miniature fireplace. In this guide, we’re going to dive into the world of candle making with wooden wicks—how to do it, what to watch out for, and why these wicks might just become your new favorite candle-making component.
Why Choose Wooden Wicks?
Before we roll up our sleeves and get into the nitty-gritty of making candles with wooden wicks, let’s take a moment to talk about why you might want to switch from the standard cotton wick.
- Aesthetic Appeal: Wooden wicks give your candles a sophisticated and contemporary look. They stand out and can add an artisanal touch to your finished product.
- Crackling Sound: One of the biggest draws of wooden wicks is the gentle crackling sound they produce when burning. It’s like having a tiny fireplace right on your table—a cozy experience that’s hard to resist.
- Cleaner Burn: Wooden wicks often result in a cleaner burn with less soot compared to some cotton wicks. This means less black smoke and fewer pollutants in the air.
- Better Fragrance Throw: Wooden wicks can help enhance the fragrance throw of your candles, meaning the scent spreads more effectively through your space.
- Eco-Friendly: Many wooden wicks are made from sustainable sources, such as FSC-certified wood, making them an environmentally friendly choice.
Getting Started: What You Need
To start your candle-making journey with wooden wicks, you’ll need a few essential supplies. Here’s a quick shopping list to get you started:
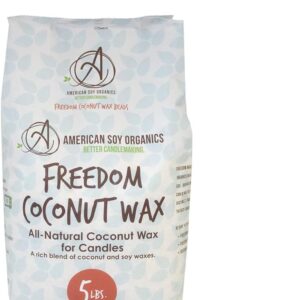
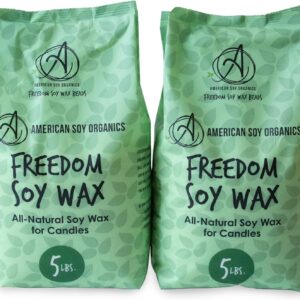
- Wax: The heart of your candle. You can use soy wax, beeswax, or paraffin, though soy wax is often preferred for its clean burn and ease of use.
- Wooden Wicks: These can be purchased online or at craft stores. They usually come with metal sustainer clips to hold them upright.
- Wick Tabs: These help secure your wooden wick in place.
- Fragrance Oils: To give your candles that delightful aroma.
- Dye: If you want to add color to your candles.
- Candle Containers: Jars, tins, or molds—whatever you want your candle to be in.
- Double Boiler: To melt your wax safely.
- Thermometer: To ensure your wax is at the correct temperature.
- Mixing Tools: A spatula or spoon to stir your wax and fragrance oil.
- Wick Trimmer: To trim the wick to the desired length.
Step-by-Step Guide to Making Candles with Wooden Wicks
Let’s get down to business! Follow these steps to create your very own wooden wick candles.
Step 1: Prepare Your Workspace
Before you start, lay down some newspaper or an old cloth to protect your workspace. Candle making can get a bit messy, especially when you’re working with wax. Make sure all your supplies are within reach.
Step 2: Measure and Melt the Wax
Measure out the amount of wax you need based on the size and number of candles you’re making. As a rule of thumb, one pound of wax will fill about two standard 8-ounce candle jars.
Set up your double boiler and melt the wax over low to medium heat. Stir occasionally to help the wax melt evenly. Use your thermometer to monitor the temperature. You want your wax to reach about 170-180°F (77-82°C), depending on the type of wax you’re using.
Step 3: Prepare the Wooden Wicks
While your wax is melting, prepare your wooden wicks. Attach the wick to the metal sustainer clip, then secure the clip to the bottom of your candle container using a bit of melted wax or a glue dot. Make sure the wick is centered and standing upright.
Step 4: Add Fragrance and Dye
Once your wax has melted and reached the desired temperature, remove it from the heat. If you’re adding fragrance oil, now’s the time to do it. Generally, you’ll want to add about 1 ounce of fragrance oil per pound of wax, but check the recommendations for your specific fragrance.
Stir the fragrance oil into the wax thoroughly. If you’re adding dye, do so now as well. Stir until the color is evenly distributed.
Step 5: Pour the Wax
Let the wax cool slightly—ideally to around 140°F (60°C)—before pouring it into your prepared containers. Pour slowly and steadily to avoid air bubbles. Make sure the wooden wick remains centered as you pour.
Step 6: Secure the Wick
Once you’ve poured the wax, you may need to adjust the wick to ensure it remains upright and centered. You can use a wick holder or simply prop it up with a pencil or chopstick laid across the top of the container.
Step 7: Let It Cool and Cure
Allow your candles to cool and solidify at room temperature. This can take several hours. It’s important not to rush this step, as cooling too quickly can cause cracks or uneven surfaces.
Once the candle has fully set, trim the wooden wick to about 1/4 inch above the surface of the wax. This will help ensure an even burn.
Step 8: Test and Enjoy
Before you start mass-producing your candles (or giving them away as gifts), it’s a good idea to test one to see how it burns. Light the candle and let it burn for a few hours, observing the flame, the burn pool (the melted wax area), and the scent throw. This will help you fine-tune your process for future candles.
Troubleshooting Tips
Making candles with wooden wicks can sometimes be a bit tricky. Here are a few common issues you might encounter and how to fix them:
- Candle Doesn’t Stay Lit: This is often due to the wick being too short or too long. Make sure the wick is trimmed to about 1/4 inch before lighting. If it still won’t stay lit, try a wider wick.
- Uneven Burn: If your candle burns unevenly, it could be due to an off-center wick. Ensure the wick is perfectly centered before the wax sets.
- Poor Scent Throw: If your candle’s scent isn’t as strong as you’d like, you might need to add more fragrance oil. Just be careful not to exceed the recommended amount for your wax type.
Tips for Success
- Choose the Right Wick Size: Wooden wicks come in different sizes, and it’s important to choose one that’s appropriate for the diameter of your candle container. If your wick is too narrow, it won’t create a large enough melt pool, and if it’s too wide, it may burn too hot.
- Cure Time: Allow your candles to cure for at least 24 hours before lighting them. This gives the wax and fragrance time to settle, which can improve the scent throw and overall burn quality.
- Experiment with Blends: Don’t be afraid to experiment with different wax blends and fragrance combinations. You might discover a new favorite scent or a wax that burns even better with wooden wicks.
Why Wooden Wick Candles Make Great Gifts
Handmade candles are always a thoughtful gift, but wooden wick candles have that extra touch of uniqueness that makes them stand out. The crackling sound, the clean burn, and the rustic aesthetic all contribute to a candle that’s more than just a source of light—it’s an experience. Whether you’re giving them as holiday presents, birthday gifts, or just because, wooden wick candles are sure to impress.
Imagine gifting a friend or loved one a candle you’ve made yourself. It’s not just a candle; it’s a piece of your time, creativity, and care wrapped up in a jar. Plus, you can customize the fragrance and color to suit the recipient’s preferences, making it an even more personalized gift.
Final Thoughts
Candle making with wooden wicks is a rewarding and enjoyable hobby that lets you combine creativity with a bit of science. The end result is a beautiful, functional piece of art that you can enjoy yourself or share with others. Whether you’re a seasoned candle maker or a complete beginner, working with wooden wicks can add a new dimension to your craft.
So, why not give it a try? With the steps and tips outlined here, you’re well on your way to making your own crackling, cozy wooden wick candles. And who knows? This might just spark a new passion—or at least a few more candles to light up your life. Happy candle making!
Also Read: How do you make candles with natural dyes? – Handmade Candles (candlecreating.com)