Those little beacons of light and warmth that set the mood, calm the nerves and can make any room smell like a field of lavender or freshly baked cookies. But sometimes, instead of a serene, even glow, you get a candle that burns unevenly, turning your zen experience into a lopsided, waxy mess. Don’t worry, though! You’re not alone in this struggle, and the good news is that troubleshooting candles that burn unevenly isn’t as tricky as it may seem. Let’s dive into the wick-ed world of candle care!
1. Understanding Why Candles Burn Unevenly
Before we can solve the problem, we need to understand what causes candles to burn unevenly in the first place. The most common culprits are:
- Wick Issues: A wick that’s too short, too long, or off-center can cause an uneven burn. The wick is the heart of the candle, and if it’s not in good shape, the flame will struggle to perform evenly.
- Tunnel Vision (Literally): This happens when the candle burns straight down the middle, leaving a ring of wax around the sides. It’s usually the result of not letting your candle burn long enough the first time you light it.
- Drafty Situations: Even the slightest breeze can make a candle’s flame dance, leading to uneven melting of the wax.
- Low-Quality Candles: Sometimes, you get what you pay for. Cheaper candles might use lower-quality wax, which doesn’t burn as evenly.
2. The First Burn: Set the Stage for Success
Did you know that the first burn is the most important one? It’s true! When you first light a candle, you should let it burn long enough so that the entire surface of the wax melts. This can take anywhere from 1 to 3 hours depending on the size of the candle.
Why is this important? Because wax has a memory. If you blow out the candle too soon, it will only remember the smaller melt pool, leading to what’s known as “tunneling” on subsequent burns. And tunneling is the enemy of an even burn.
Tip: Aim to burn your candle for one hour per inch of its diameter the first time you light it. So, if your candle is 3 inches wide, let it burn for at least 3 hours.
3. Trimming the Wick: Snip Snip, Hooray!
Wick length plays a crucial role in how your candle burns. If the wick is too long, it can cause the candle to flicker, leading to uneven melting. If it’s too short, the flame might not be strong enough to melt the wax evenly.
The magic length for most candle wicks is about 1/4 inch. Before lighting your candle, always check the wick length and give it a trim if needed. And don’t forget to remove the wick trimmings before you light it!
Tip: Invest in a wick trimmer. It’s a small tool, but it makes a big difference, allowing you to trim the wick to just the right length without making a mess.
4. Recenter the Wick: Keep It on the Straight and Narrow
Sometimes the wick can drift off-center as the candle burns, especially if the wax becomes very soft. This can lead to an uneven burn, with one side of the candle melting faster than the other.
To avoid this, check your wick’s position before and after burning. If it’s leaning to one side, gently nudge it back to the center while the wax is still soft. This will help ensure a more even burn next time you light the candle.
Tip: Use a pair of tweezers or a wick dipper to reposition the wick while the wax is soft but not too hot to handle.
5. Avoid Drafts: Location, Location, Location
Even a small draft can cause your candle’s flame to flicker, which in turn can lead to uneven burning. To give your candle the best chance of burning evenly, place it in a spot where it won’t be exposed to wind or sudden gusts of air. This means keeping it away from open windows, fans, or even air conditioning vents.
Tip: If you must have your candle near a drafty spot, consider using a hurricane vase or lantern to shield the flame.
6. Fixing an Uneven Burn: Rescue Mission
Let’s say you’ve already got an uneven burn going. What now? Don’t despair—there are a few tricks you can use to even things out.
- Foil Trick: One of the most effective methods for fixing tunneling is to wrap the top of the candle with aluminum foil, leaving an opening in the center for the wick to burn. This helps trap heat and allows the wax around the edges to melt more evenly. After about 30 minutes, you should see the wax level out. Just be careful not to let the foil touch the flame!
- Oven Method: If you’re feeling adventurous and the candle jar is oven-safe, you can place your candle in the oven on a low temperature (around 175°F or 80°C) for about 10-15 minutes. This should melt the wax evenly across the surface. Be sure to keep a close eye on it, and use oven mitts when handling the hot candle.
- Hair Dryer Method: If the idea of putting your candle in the oven feels too risky, a hair dryer can achieve similar results. Hold the dryer a few inches away from the candle and move it in a circular motion until the wax melts evenly across the top.
Tip: Always exercise caution when using heat to fix your candle. Safety first!
7. Choosing Quality Candles: Prevention Is Better Than Cure
Sometimes, despite your best efforts, a candle just won’t burn evenly. This is often the case with lower-quality candles, which might use inferior wax, poorly centered wicks, or simply aren’t designed to burn evenly.
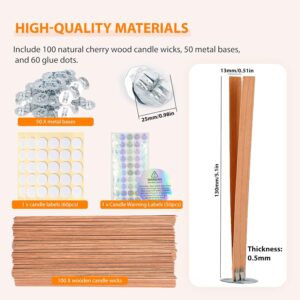
Investing in high-quality candles can save you a lot of trouble. Look for candles made from natural waxes like soy, beeswax, or coconut, which tend to burn more evenly than paraffin. Also, pay attention to reviews and brand reputation—some companies are known for their excellent craftsmanship when it comes to candle-making.
Tip: If you’re a frequent candle user, consider buying from a local artisan or a reputable brand that specializes in high-quality, hand-poured candles.
8. Candle Care 101: Keep the Flame Alive
Taking good care of your candles can make all the difference in how they burn. Here’s a quick checklist to keep your candles burning brightly and evenly:
- Trim the wick before each use.
- Burn the candle long enough for the entire surface to melt.
- Keep the wick centered.
- Avoid burning candles near drafts.
- Store your candles in a cool, dry place.
Following these simple steps will not only help prevent uneven burns but also extend the life of your candles, giving you more hours of flickering warmth and delightful fragrance.
9. When All Else Fails: Reuse and Repurpose
If your candle has burned unevenly and you’ve tried everything to fix it, but nothing works—don’t toss it just yet! There are still ways to get some value out of that waxy wonder.
- Make Wax Melts: Scoop out the remaining wax and melt it down to create your own wax melts. You can use a silicone mold to create fun shapes that you can then use in a wax warmer.
- Create a New Candle: If you have several candles with leftover wax, melt them down together and pour the mixture into a new container with a fresh wick to create a unique, upcycled candle.
- Fire Starters: Leftover candle wax can be used to make fire starters. Just dip some cotton balls, pine cones, or twine into the melted wax and let it harden. They’re perfect for starting a cozy fire in your fireplace or for your next camping trip.
Final Thoughts: Keep Calm and Candle On
Candle troubles can be frustrating, especially when you’re just trying to enjoy a peaceful evening. But with a little know-how and some TLC, you can ensure your candles burn evenly, providing hours of enjoyment. Remember, the key to a happy candle is proper care and attention right from the start.
So next time you light a candle, give it the time it needs to create that perfect melt pool, keep that wick trimmed, and avoid the breeze. And if things start to go wonky, you now have a toolkit of tricks to get your candle back on track.
Got any candle troubleshooting tips of your own? Or maybe a candle horror story where nothing seemed to go right? Share your experiences—because when it comes to candle care, we’re all in this together!