If you’ve ever strolled through a craft market or browsed an artisanal shop, you’ve probably encountered the stunning beauty of candles with embedded flowers. These elegant creations aren’t just a feast for the eyes but also a charming addition to any home decor. Whether you’re looking to impress guests, create a thoughtful gift, or just want to add a touch of nature to your living space, making candles with embedded flowers is a delightful and rewarding DIY project.
So, grab your crafting apron and let’s dive into the world of candle-making with a floral twist. Not only will you end up with something gorgeous, but you might also find the process surprisingly relaxing!
Why Make Candles with Embedded Flowers?
Before we get into the nitty-gritty of candle-making, let’s talk about why you should consider making candles with embedded flowers in the first place.
- Aesthetic Appeal: Flowers inside a candle create a visually stunning effect, transforming a plain wax cylinder into a work of art. They’re perfect as a centerpiece or as a decorative item on a shelf.
- Personalized Gifts: Handmade candles with carefully selected flowers make incredibly thoughtful gifts. Whether it’s for a birthday, wedding, or holiday, these candles say, “I made this just for you.”
- Aromatherapy: Depending on the flowers and essential oils you use, these candles can also offer subtle scents that enhance relaxation, making them perfect for unwinding after a long day.
- Connection to Nature: In our increasingly digital world, embedding flowers into a candle is a way to bring a little bit of the outdoors inside. It’s a small reminder of nature’s beauty in our everyday lives.
Materials You’ll Need
Let’s start by gathering all the materials you’ll need. Remember, a successful project begins with being well-prepared!
Basic Candle-Making Supplies:
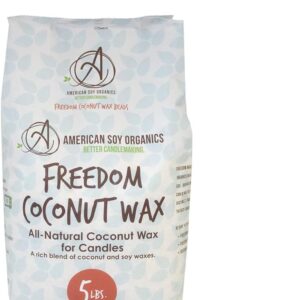
- Wax: The foundation of your candle. You can use soy wax, beeswax, or paraffin wax. Soy wax is a popular choice due to its eco-friendliness and clean burn.
- Wicks: Choose wicks that match the diameter of your candle. Cotton wicks are common, but wooden wicks are also an excellent choice for a rustic feel.
- Double Boiler: Essential for melting the wax safely. If you don’t have one, a heatproof container inside a pot of simmering water will work.
- Thermometer: To monitor the temperature of your wax. This is crucial because pouring at the wrong temperature can ruin the candle’s appearance and function.
- Pouring Pot: Used to pour the melted wax into the mold or container.
- Candle Mold or Container: You can use a variety of containers, from classic glass jars to fun shapes using silicone molds.
- Stirring Stick: To mix the wax and any added scents or colors evenly.
Special Additions:
- Dried Flowers: The stars of the show! Choose flowers that dry well and retain their color. Popular choices include lavender, rose petals, marigolds, daisies, and baby’s breath. Ensure the flowers are completely dry to avoid any mold growth inside the candle.
- Essential Oils: For adding scent. Lavender, rose, and citrus oils work wonderfully, especially if they complement the flowers you’ve chosen.
- Color Dye (Optional): If you want your candle to have a specific hue, add some candle-safe dye. However, keep in mind that colors might alter the appearance of the flowers inside.
- Floral Tape: This helps to hold the flowers in place before you pour the wax.
- Mod Podge or Glue: For securing flowers against the sides of the mold or container before pouring the wax.
Step-by-Step Guide to Making Candles with Embedded Flowers
Now that we’ve gathered our materials, it’s time to get down to business. This process involves a few steps, but with patience and attention to detail, you’ll create something beautiful.
Step 1: Preparing the Flowers
- Dry Your Flowers: If you’re starting with fresh flowers, dry them by hanging them upside down in a cool, dry place for about a week. You can also press them between heavy books with wax paper if you prefer a flatter appearance.
- Trim the Flowers: Once dry, trim the flowers to fit inside your candle mold or container. If the flowers are too large, they can create air pockets or interfere with the wick.
Step 2: Prepare Your Mold or Container
- Position the Wick: Place the wick in the center of your mold or container. You can use a wick holder or a pencil to keep it in place.
- Attach Flowers: Using a small amount of Mod Podge or glue, attach the dried flowers to the sides of your mold or container. Be gentle and take your time, as the placement of the flowers will determine the final look of your candle. Use floral tape to help hold them in place if needed.
- Let It Dry: Allow the glue or Mod Podge to dry completely before moving on to the next step. This ensures the flowers stay in place when you pour the hot wax.
Step 3: Melting and Pouring the Wax
- Melt the Wax: Using your double boiler, melt the wax gently over medium heat. Stir occasionally with your stirring stick until fully melted. Avoid overheating the wax, as this can cause issues with the candle’s finish.
- Add Essential Oils: Once the wax has melted and reached the correct temperature (usually around 180°F or 82°C for soy wax), add your chosen essential oils. The amount will depend on how strong you want the scent, but a general rule is 1 oz of essential oil per pound of wax.
- Add Color (Optional): If you’re adding color, do so at this stage. Stir thoroughly to ensure an even distribution of color.
- Pour the Wax: Slowly and carefully pour the wax into your mold or container, ensuring that the flowers remain in place. Pouring too quickly can dislodge the flowers, so take your time.
- Cooling: Allow the candle to cool completely. This can take several hours, depending on the size of the candle. It’s important not to rush this process, as cooling too quickly can cause the candle to crack.
Step 4: Finishing Touches
- Trim the Wick: Once the candle has cooled and set, trim the wick to about 1/4 inch above the surface of the candle. This helps ensure a clean, even burn.
- Inspect Your Candle: Check the placement of the flowers. If you’re happy with the result, you’re done! If some flowers aren’t visible enough, you can gently carve away a little wax to expose them.
- Polish (Optional): For an extra touch of shine, you can polish the surface of your candle with a soft cloth.
Tips and Tricks for the Perfect Floral Candle
- Flower Placement: Remember that the flowers should be pressed firmly against the sides of the mold or container. If they’re floating in the middle, they might not be as visible once the candle is burned.
- Test First: If this is your first time making a candle with embedded flowers, start with a small test candle. This will help you get a feel for the process without using all your materials.
- Avoid Overcrowding: Less is more when it comes to embedding flowers. Too many flowers can create air pockets and affect how the candle burns.
- Scent and Color Matching: Choose essential oils and color dyes that complement the flowers you’re using. For instance, lavender flowers pair well with purple dye and lavender essential oil.
- Storage: Store your candles in a cool, dry place. Heat and humidity can affect the appearance and scent of your candles over time.
Conclusion: Your Floral Masterpiece
And there you have it—your very own candle with embedded flowers! It’s more than just a candle; it’s a piece of art, a labor of love, and a testament to your creativity. Whether you’re making these candles for yourself, as gifts, or even to sell, the satisfaction of seeing the final product is unmatched.
So next time you find yourself with a free afternoon and a creative itch, why not try making a candle with embedded flowers? Not only will you end up with a beautiful result, but you’ll also find the process therapeutic and fulfilling. Plus, you’ll have something gorgeous to show off or give away. Happy candle-making!
Also Read: How to Make Floating Candles: A Step-by-Step Guide – Handmade Candles (candlecreating.com)