Have you ever wandered through a cozy, aromatic shop and wondered how they capture such delightful scents in those tiny flickering flames? Or perhaps you’ve thought about bringing that calming atmosphere into your own home, but weren’t quite sure where to start. Well, buckle up, candle lovers, because today we’re diving into the world of making aromatherapy candles. We’ll cover everything from the basics of choosing the right aromatherapy oils for candle making to answering that burning question (pun intended) – can you use aromatherapy oil in candles?
Why Aromatherapy Candles?
First things first, why even bother with aromatherapy candles? Can’t you just grab any old candle from the store and call it a day? Sure, you could, but where’s the fun in that? Aromatherapy candles are not just about ambiance; they’re about transforming your space and mind with the power of scent.
When you light an aromatherapy candle, you’re doing more than just setting the mood. You’re inviting the therapeutic benefits of essential oils into your space. Depending on the oils you use, these candles can help you relax, focus, energize, or even relieve stress. Plus, there’s something incredibly satisfying about crafting your own candles—knowing that each one is a unique blend of your favorite scents and a little piece of your creativity.
Getting Started: What You’ll Need
Before you start blending and pouring, let’s talk about the basics. Here’s a quick rundown of what you’ll need to make your own aromatherapy candles:
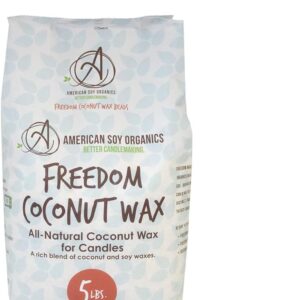
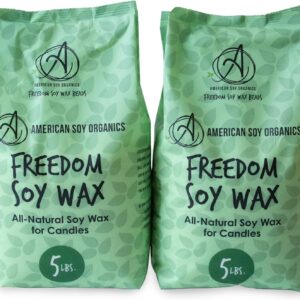
- Wax: The foundation of any candle. Soy wax is a popular choice because it burns cleanly and is eco-friendly. Beeswax is another excellent option, offering a natural, subtle honey scent.
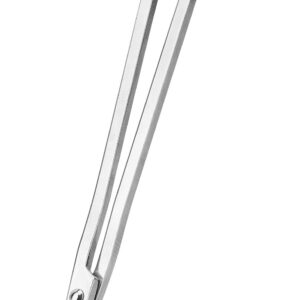
- Wicks: The heart of your candle. Cotton wicks are standard, but wood wicks are also an option for a crackling fireplace effect.
- Containers: Whether it’s a mason jar, a vintage teacup, or a sleek tin, the container holds your wax and adds a decorative touch.
- Aromatherapy Oils for Candle Making: This is the magic ingredient that makes your candle a therapeutic experience. More on this in just a bit!
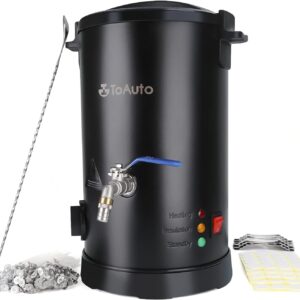
- Double Boiler: A must-have for safely melting your wax.
- Thermometer: To ensure your wax is at the right temperature for pouring.
- Stirring Stick: To mix in your oils.
Now, let’s talk about the star of the show—aromatherapy oils for candle making.
Aromatherapy Oils for Candle Making: The Essentials
Aromatherapy oils, also known as essential oils, are the lifeblood of any good aromatherapy candle. These oils are extracted from plants and contain the plant’s essence in a highly concentrated form. They’re what give your candle that distinctive scent and provide the therapeutic benefits you’re after.
Choosing the Right Oils
When selecting aromatherapy oils for candle making, it’s crucial to consider both the scent and the effect you want to achieve. Here are a few popular choices:
- Lavender: Known for its calming and soothing properties, lavender is a favorite for stress relief and relaxation.
- Eucalyptus: This oil is fresh, clean, and known for its ability to clear the mind and promote focus.
- Lemon: Bright and uplifting, lemon essential oil can boost your mood and energy levels.
- Peppermint: Energizing and invigorating, peppermint oil is great for enhancing concentration.
- Rose: A classic scent, rose oil is often used for its romantic and calming properties.
Blending Oils
You can blend different oils to create your own unique scent profile. For example, a mix of lavender and lemon can be both calming and uplifting—a perfect combination for a balanced atmosphere. Experiment with different combinations to see what works best for you.
Dos and Don’ts of Using Aromatherapy Oils in Candles
Alright, let’s address the elephant in the room—can you use aromatherapy oil in candles? The short answer is yes, but with a few caveats.
The Dos:
- Do use high-quality, pure essential oils. Synthetic fragrances might be cheaper, but they don’t offer the same therapeutic benefits and can sometimes produce harmful fumes when burned.
- Do measure carefully. Essential oils are potent. A general rule of thumb is to use about 30-40 drops of essential oil per 8 ounces of wax. Too much oil can cause your candle to burn unevenly or even catch fire—definitely not the relaxing experience you’re going for!
- Do add the oils at the right temperature. Add your oils when the wax is between 150-160°F (65-70°C). This helps preserve the integrity of the oils while ensuring they mix thoroughly with the wax.
The Don’ts:
- Don’t use oils that aren’t meant for burning. Some oils aren’t suitable for candle making because they don’t blend well with wax or could produce harmful fumes. Stick to essential oils labeled as safe for use in candles.
- Don’t skimp on mixing. Make sure the oils are well-blended into the wax. This ensures a consistent scent throughout the life of your candle.
The Candle-Making Process
Now that you’ve got your ingredients and you know your dos and don’ts, it’s time to get down to business.
Step 1: Melt the Wax
Start by melting your wax in a double boiler. Patience is key here—don’t rush the process by cranking up the heat. You want the wax to melt slowly and evenly.
Step 2: Prepare the Wicks
While the wax is melting, prepare your wicks. Secure them in the center of your container. You can use a bit of melted wax or a wick sticker to hold them in place. This step ensures your wick stays put when you pour in the wax.
Step 3: Add the Aromatherapy Oils
Once your wax has melted and cooled slightly (remember, between 150-160°F), it’s time to add your aromatherapy oils for candle making. Stir gently but thoroughly to make sure the oils are evenly distributed.
Step 4: Pour the Wax
Carefully pour the wax into your prepared containers, making sure to keep the wicks centered. Leave a bit of space at the top of the container to prevent overflow.
Step 5: Let Them Cool
Now comes the hardest part—waiting! Let your candles cool and harden for at least 24 hours before trimming the wicks and lighting them.
Troubleshooting Common Issues
Even with the best-laid plans, things can sometimes go awry. Here are a few common issues and how to fix them:
- Scent not strong enough? You might not have added enough essential oil, or the oils might have been added at too high a temperature. Make sure to measure your oils carefully and add them at the right temperature.
- Candle tunneling? This happens when the candle burns down the center, leaving wax on the sides. To prevent this, make sure you let the candle burn long enough each time so that the entire surface melts.
- Wick not staying lit? This could be due to too much fragrance oil or a wick that’s too thick for the size of the candle. Try using a smaller wick or reducing the amount of oil.
The Final Burn
Making your own aromatherapy candles is a fun and rewarding experience. Not only do you get to create something beautiful and functional, but you also get to fill your home with scents that make you feel good. And now that you know you can use aromatherapy oil in candles, the possibilities are endless. Whether you’re crafting for yourself or making gifts for friends and family, these candles are sure to bring a little extra warmth and tranquility to any space.
So, what are you waiting for? Grab those wicks, melt that wax, and start blending your favorite aromatherapy oils for candle making. Your nose (and your mind) will thank you!
Also Read: Creating Candles with Embedded Flowers – Handmade Candles (candlecreating.com)