
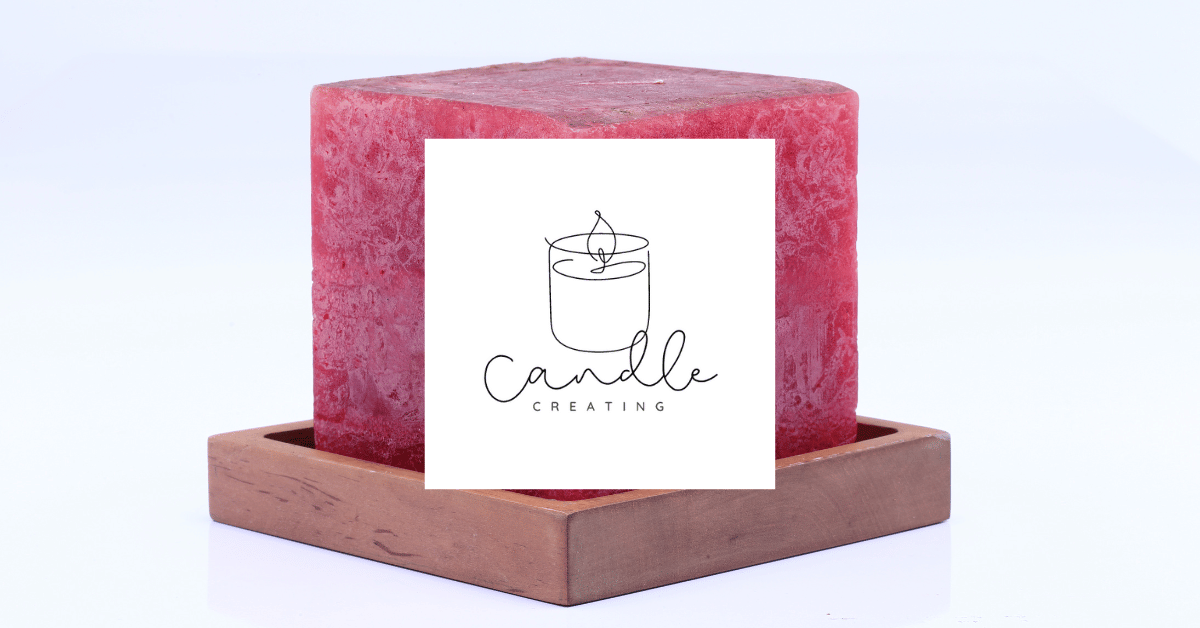
Decorative Candle Technique
Marbled candles are created by allowing two or more shades of wax to meet without blending completely. The pattern comes from controlled pouring, wax viscosity, and a small number of deliberate tool movements. The goal is visible veining and ribbons of color while keeping the wick centered and the candle formula suitable for a complete burn test.
Quick answer: Make one uniform batch of candle wax, divide off a smaller accent portion, and color each portion with candle-specific dye. Pour the base and accent wax in alternating ribbons, then make one or two gentle passes with a clean skewer. Stop before the colors blend into one shade. Follow the wax supplier’s temperatures and test the finished candle through its full usable life.
How Marbled and Swirled Wax Patterns Work
A marble pattern forms when differently colored wax portions are fluid enough to join but viscous enough to retain separate ribbons. If the wax is too hot and thin, the colors can mix into a flat intermediate shade. If it is too cool or partially solid, the pours may form hard layers, gaps, rough surfaces, or poor adhesion.
There is no universal marbling temperature. Paraffin, soy, beeswax, and blended waxes have different melt ranges, additives, crystallization behavior, and recommended pouring conditions. Begin with the processing guidance supplied for the exact wax and adjust only through small, documented tests.
Marbled effect
Irregular veins and soft transitions created by alternating pours and minimal tool movement.
Ribbon swirl
Longer curved bands made by pouring the accent color in a narrow stream while moving around the vessel.
Layered vein
Distinct color boundaries created by allowing each shallow pour to thicken before adding the next.
Surface swirl
A shallow pattern limited mainly to the top, created after the main candle has begun to set.
The first test should be simple: Use one wax, one wick system, two dye shades, and no fragrance. Once the base candle burns reliably, add fragrance as a separate formula change and repeat the testing process.
Supplies for Making Marbled Candles
- Wax formulated for the type of candle you are making
- Candle-rated container or suitable candle mold
- Compatible wick in several nearby test sizes
- Candle-specific liquid dye, dye chips, or dye blocks
- Digital scale for wax, fragrance, and additives
- Thermometer appropriate for candle-making temperatures
- Controlled water-bath or double-boiler melting setup
- Main pouring pitcher plus small heat-safe pitchers for accent colors
- Clean stainless-steel or candle-making stirring tools
- Thin metal tool or smooth skewer reserved for candle making
- Wick adhesive and centering tool
- Heat-resistant gloves, safety glasses, labels, and batch notes
If this is your first candle project, begin with the complete beginner materials checklist. Marbling adds timing and extra pitchers to the normal process, so understanding the basic pour first makes the decorative technique easier to control.
Use candle dye, not a household substitute
Candle dye is designed to disperse or dissolve in wax at low usage levels. Crayons contain pigments and other materials that can interfere with the wick. Food coloring is water-based and will not combine properly with wax. Mica, glitter, paint, makeup pigment, powdered spices, and loose botanical powders can settle, clog the wick, or become unwanted debris in the melt pool.
Do not add more dye simply to make a dramatic swirl. Dark and heavily dyed sections can burn differently from the lighter base. Stay within the dye supplier’s instructions and treat every dye-level change as a formula change requiring another burn test.
Plan the Wax, Wick, Fragrance, and Colors
Match the wax to the candle format
For a container candle, use a container-wax blend intended to remain in a candle-rated vessel. For a freestanding molded candle, use pillar or molded-candle wax formulated to hold its shape after release. A wax that works in a jar may be too soft for a pillar, while a hard pillar wax may pull away noticeably in a container.
Compare the major options in the guide to choosing candle wax for different projects.
Choose two colors first
A light base and one darker accent produce the clearest beginner marble. Similar colors create a subtle stone-like effect, while contrasting colors make bolder ribbons. Three or more shades become muddy more easily and create additional dye variables.
- Soft and natural: Ivory with warm tan
- Ocean inspired: White with muted blue
- Stone effect: Pale gray with charcoal
- Warm sunset: Cream with terracotta
- Botanical palette: Soft cream with sage green
The color of liquid wax can look darker than the cooled result. Place a small drop of each colored portion on a white ceramic plate or another heat-suitable test surface and let it harden before deciding whether to add more dye.
Make one master batch before dividing colors
When fragrance is included, weigh and mix it thoroughly into the full wax batch before dividing the wax into color portions. This keeps the fragrance concentration consistent. Adding fragrance separately to small pitchers increases measurement error and may create sections with different oil loads.
Use the fragrance percentage permitted by the exact wax and fragrance suppliers, measured by weight. The old rule of one ounce per pound is not universal. An unscented first test makes it easier to evaluate the wax, dye, wick, and pour technique without another variable.
Method 1: Marbled Container Candles
This two-pitcher method produces irregular ribbons through the body of a jar candle. Make multiple identical test candles so the results can be compared rather than relying on one attractive pour.
- Create the batch record. Record the wax, wick series and size, vessel, total wax weight, dye products and amounts, fragrance percentage if used, and the planned split between base and accent wax.
- Prepare the containers. Inspect each candle-rated vessel for chips, cracks, deep scratches, or an uneven base. Attach and center the wick using supplies intended for candle assembly.
- Weigh and melt the wax. Use controlled indirect heat and follow the wax supplier’s processing range. Never melt wax directly over a flame and never leave heating wax unattended.
- Add fragrance uniformly if included. Weigh the fragrance and mix it into the complete batch according to supplier directions. Do not estimate with drops, teaspoons, or an unverified formula.
- Divide the master batch. Transfer a smaller portion to a second warm pouring pitcher for the accent color. A modest accent portion is easier to control than equal quantities of two dark colors.
- Color each portion. Add candle dye within the supplier’s recommended range. Stir until fully dispersed, using separate clean tools or wiping the tool carefully between colors.
- Monitor both portions. The base and accent wax should remain within a compatible pouring condition. A tiny pitcher can cool faster than the main pitcher, so check both rather than assuming they match.
- Begin with the base wax. Pour part of the base into the container slowly. Keep the stream controlled and avoid pouring directly onto the exposed wick.
- Add narrow accent ribbons. Pour a small amount of accent wax along different areas of the vessel, followed by more base. Alternate the pours until the container reaches the intended fill level.
- Make one or two gentle passes. Insert a clean thin tool away from the wick and draw a slow curve or figure-eight through the liquid. Do not scrape the vessel, strike the wick tab, or stir in circles.
- Stop before the colors merge. Marbling becomes less distinct with every pass. Remove the tool slowly and check that the wick remains centered.
- Cool and cure. Leave the candle undisturbed at room temperature and follow the wax supplier’s cure recommendation. Label it with the full formula and date before burn testing.
Cleaner veining comes from restraint. Alternate a few narrow accent pours with larger base pours. One deliberate tool movement usually produces a more recognizable marble than repeated stirring.
Method 2: Marbled Molded Candles
A molded candle reveals its pattern only after release, which makes the result less predictable. Use a wax formulated for pillars or molds and a simple symmetrical mold while learning the technique.
- Prepare the mold and wick. Follow the mold’s instructions for wick placement, sealing, and release. Center the wick precisely from multiple viewing angles.
- Make and divide one master batch. Melt, fragrance if applicable, and split the wax using the same controlled process as the container method.
- Color the portions sparingly. A light base with one stronger accent tends to produce visible exterior veins without requiring a large total dye load.
- Pour from alternating sides. Add some base wax, then a narrow stream of accent wax along one side of the mold. Rotate the pour position rather than stirring the entire mold.
- Build the pattern upward. Continue alternating small accent ribbons and larger base pours. Keep the wick centered and avoid splashing wax onto it.
- Use minimal tool movement. If the mold opening permits, make one shallow pass with a clean tool. Do not drag the tool against the mold wall or dislodge the wick.
- Cool according to the wax instructions. Pillar wax commonly contracts as it cools. Follow the supplier’s guidance for relief holes, repours, cooling, and release rather than improvising.
- Unmold only when fully ready. Forcing a warm candle from the mold can distort its shape and smear the surface pattern.
- Inspect before testing. Reject candles with cracks, large voids, exposed wick tabs, severe leaning, or wick displacement.
Molded candles require a noncombustible holder large enough to catch melted wax. Test the complete candle and holder combination on a stable heat-resistant surface.
Marbling and Swirl Pattern Variations
Soft stone marble
Use a pale base and a small amount of gray, tan, or muted green accent wax. Pour thin veins and make one slow vertical pull.
Ribbon swirl
Move the accent stream around the vessel while alternating with the base. Skip the skewer or use only one gentle curve near the top.
Layered marble
Allow shallow layers to thicken slightly between pours, then add the next color at an offset angle. This produces more defined bands and less internal blending.
Top-only swirl
After the main candle begins setting, add a small amount of compatible colored wax to the surface and draw one shallow pattern. Keep the tool away from the wick.
Can you create a swirl with fragrance?
Fragrance is not a visible colorant and should not be concentrated into decorative ribbons. Uneven fragrance distribution can create seepage, local fuel differences, and inconsistent burning. Mix fragrance uniformly into the full master batch, then create the visual effect with approved candle dye.
Can the colors have different fragrances?
Using a different fragrance in each color makes the formula substantially harder to evaluate because each section may have different compatibility and burn behavior. Begin with one fragrance mixed uniformly throughout the candle. If a multi-fragrance design is ever developed, it needs a documented formulation and a complete new testing program.
Marbled Candle Troubleshooting
| Problem | Likely causes | What to test next |
|---|---|---|
| Colors blend into one shade | Wax was very fluid, colors were stirred too much, or accent pours were too large. | Use fewer tool passes, narrower accent streams, and supplier-compatible lower pouring conditions. |
| Hard layers instead of marble | One portion cooled too far or too much time passed between pours. | Monitor both pitchers and shorten the interval while remaining within supplier guidance. |
| Accent color sinks | The portions had different viscosities or the accent stream was poured heavily into thin base wax. | Bring both portions to a more similar pouring condition and use smaller accent amounts. |
| Top is rough or uneven | Pour temperature, room conditions, wax crystallization, or tool movement disturbed the surface. | Adjust the process according to the wax supplier; use a heat gun cautiously only after diagnosing the cause. |
| Air pockets or voids | Wax was too cool, pouring trapped air, or the tool created channels. | Pour more steadily, reduce tool movement, and follow the mold or wax supplier’s repour guidance. |
| Wick moves off center | The pouring stream or skewer contacted the wick, or the centering support was loose. | Secure the wick better and keep pours and tools away from it. |
| Dark sections clog or weaken the wick | Dye load is excessive or a pigment unsuitable for candles was used. | Return to candle dye at a lower documented amount and test nearby wick sizes. |
| Pattern disappears after cooling | The colors were too similar or became fully blended while liquid. | Increase contrast modestly without exceeding dye guidance and reduce mixing. |
For additional diagnostic help, use the guide to common candle-making mistakes. Change one variable at a time so the next test can identify what actually improved the result.
Should you use a heat gun?
A heat gun can remelt a rough top, but it can also overheat the wax, damage the wick coating, disturb the color pattern, heat the vessel unevenly, or blow liquid wax. Use the lowest effective setting, keep the tool moving, and follow its instructions. Do not use a household hair dryer; its airflow can scatter dust and splash or push liquid wax.
Burn-Test Every Marbled Candle Formula
Decorative success does not prove safe candle performance. Dye, fragrance, wax portions, pouring conditions, and wick disturbance can change the melt pool and flame. Test the exact wax, dye amounts, fragrance, wick, vessel or mold, and technique as one system.
Record these observations
- Flame height and movement
- Visible smoke, soot, or carbon buildup
- Wick leaning, curling, mushrooming, or drowning
- Melt-pool diameter, depth, and symmetry
- Whether differently colored sections melt or feed the wick unevenly
- Container temperature and any signs of stress or damage
- Fragrance seepage, dye migration, sediment, or debris
- End-of-life behavior and the manufacturer’s stopping point
Test through the complete usable life of the candle in repeated observed sessions. A candle that performs well during its first burn can behave differently when the flame sits lower in the vessel. Follow the wick supplier’s chart only as a starting point and confirm the final choice experimentally. The guide to candle wick types and sizing explains why vessel diameter alone cannot determine the correct wick.
Open-flame safety: Burn the candle within sight, in a stable holder or candle-rated container, and at least 12 inches from anything that can burn. Keep it away from children, pets, fans, vents, drafts, curtains, paper, and decorations.
Materials and Shortcuts to Avoid
- Crayons: Their pigments and additives are not a substitute for candle dye and may interfere with wick performance.
- Food coloring: Water-based color does not mix properly with candle wax.
- Mica and craft pigment: Suspended particles can settle or restrict fuel flow through the wick.
- Glitter: It adds debris near the melt pool and flame without improving candle performance.
- Powdered spices or plants: Turmeric, coffee, beet powder, herbs, and similar materials are combustible particles, not dependable candle dyes.
- Water-based paint or ink: These products are not formulated to become candle fuel.
- Microwave melting: It can create uneven hot spots and provides less process control than a monitored water bath or regulated wax melter.
- Household glassware: A drinking glass or decorative jar is not automatically a candle-rated container.
- Repeated stirring: More swirling usually produces muddy color rather than better marble.
- Unrecorded experiments: Without exact weights and process notes, an attractive result cannot be reproduced or evaluated reliably.
Color is optional, and a safe base candle matters more than a dramatic pattern. Build the candle with documented components, keep additive levels conservative, and add complexity only after the simpler version burns reliably.
Frequently Asked Questions
What wax is best for marbled container candles?
Use a wax formulated for container candles and supported by clear supplier instructions. Soy, paraffin, coconut blends, and other container waxes can all produce patterns, but their pouring behavior and final appearance differ. The best choice is one you can process consistently and burn-test in the intended vessel.
Can I use crayons to color marbled candles?
No. Crayons use pigments and additives intended for drawing, not for traveling through a candle wick as fuel. Use dye specifically made for candles and stay within its supplier’s instructions.
How many colors should a beginner use?
Start with two: a light base and one accent. This makes it easier to see how temperature, viscosity, pouring, and tool movement affect the design without creating several different dye loads.
Why did my swirl turn into one muddy color?
The wax portions probably mixed too completely. Common causes include pouring while both portions are very thin, using too much accent wax, or making too many passes with the swirling tool. Use narrower ribbons and stop sooner.
Can I add fragrance to only one color?
That creates uneven fragrance concentration and can make sections of the candle behave differently. Mix the approved fragrance amount uniformly into the master batch before splitting the wax for color.
Can mica powder create a shimmering marble?
Mica is a suspended mineral pigment rather than a typical soluble candle dye. It can settle and interfere with wick fuel flow. Keep mica out of a wicked candle unless a qualified supplier specifically documents the material and complete formula for that use.
Why are my color layers separating?
The earlier layer may have cooled too far before the next pour, or the wax portions may have been at very different temperatures. Test shorter intervals and monitor both pitchers while staying within the wax supplier’s processing guidance.
Does a decorative candle still need a full burn test?
Yes. If the candle can be lit, it should be developed and tested as a burning product. Color distribution, fragrance, wick placement, vessel, and wax all influence performance even when the primary goal is decorative.
Make the Pattern Deliberate, Then Test the Candle
The most convincing marble patterns come from a simple formula, two controlled colors, narrow accent pours, and fewer tool movements than you may expect. Record the process so the design can be repeated, and never let appearance replace complete burn testing.
Continue with the main How to Make Candles resource, compare wax types for different candles, or review the guide to choosing and testing candle wicks.
Safety note: Candle making involves hot wax and finished products with an open flame. Follow supplier instructions, use protective equipment, keep water out of molten wax, never leave heating wax or a burning candle unattended, and test each formula completely before gifting or selling it.