Have you ever found yourself enchanted by the gentle flicker of a candle’s flame, casting a warm glow and filling the air with delightful fragrances? Maybe you’ve thought, “Hey, I could make that!” Well, you’re not alone. Candle making is a creative and rewarding hobby that many people enjoy, not just for the beautiful candles they produce, but for the therapeutic process itself. If you’re ready to dive into this soothing craft, you’re going to need the right tools. Let’s break down the essential tools for candle making that will turn your kitchen into a full-blown candle-making studio.
1. Wax
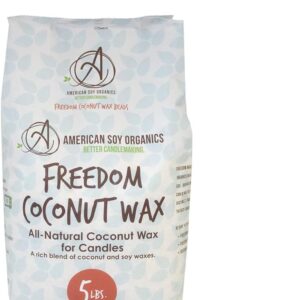
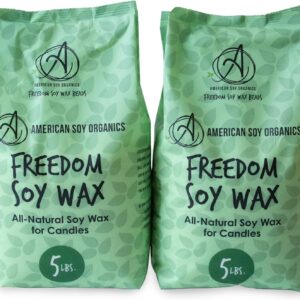
Wax is the backbone of any candle, and choosing the right type of wax is crucial for your candle-making success. Here’s a rundown of the main types:
- Paraffin Wax: Widely used and inexpensive, it holds fragrance well and produces bright, vibrant colors.
- Soy Wax: A natural alternative to paraffin, it burns cleaner and longer, and it’s eco-friendly.
- Beeswax: This natural wax burns the longest and has a pleasant, subtle honey scent.
- Palm Wax: Known for its crystallized appearance, palm wax is another natural option, but be mindful of its environmental impact.
Each wax type has its pros and cons, so consider what’s most important to you: cost, burn time, or environmental impact.
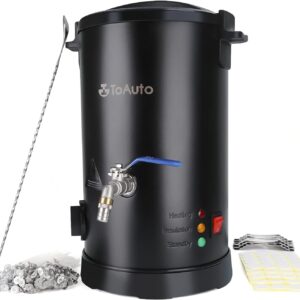
2. Double Boiler
Melting wax requires careful temperature control, and a double boiler is the safest way to do this. A double boiler consists of two pots: the bottom pot holds boiling water, while the top pot holds the wax. This indirect heat prevents the wax from burning or overheating, which can be a safety hazard. If you don’t have a double boiler, you can use a heat-resistant pouring pitcher in a saucepan of water. But honestly, investing in a proper double boiler makes life a lot easier.
3. Thermometer
Temperature plays a critical role in candle making. Whether you’re melting wax or adding fragrance, getting the temperature right ensures a successful outcome. A good-quality thermometer will help you monitor the temperature of your wax as it melts, ensuring it doesn’t get too hot (which can cause it to discolor or ignite) or too cool (which can lead to poor fragrance throw or an uneven surface). Aim for a range of 170-185°F when adding fragrance and pouring the wax.
4. Pouring Pitcher
A pouring pitcher is essential for transferring melted wax into your molds or containers. Look for a pitcher made of durable stainless steel with a spout designed for smooth, controlled pouring. This tool helps you avoid spills and makes the process much more manageable, especially when working with larger batches of candles.
5. Molds and Containers
Your choice of mold or container will shape your candle and give it character. There are endless options here:
- Glass Jars: Ideal for beginners, they’re easy to find and work well with most types of wax.
- Silicone Molds: Perfect for intricate shapes and easy to release the finished candle.
- Metal Molds: Durable and reusable, these are great for pillar candles.
The size and shape of your mold or container will affect how your candle burns, so experiment with different options to find what you like best.
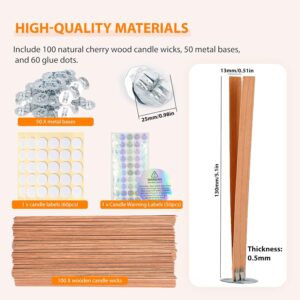
6. Wicks
Choosing the right wick is essential for a clean, even burn. Wicks come in various sizes and materials, including cotton, wood, and hemp. The size of the wick should match the diameter of your candle to ensure it burns evenly. Here’s a quick guide:
- Cotton Wicks: The most common type, they work well with most waxes and are easy to use.
- Wood Wicks: These create a cozy crackling sound as they burn, adding an extra sensory dimension to your candles.
- Hemp Wicks: Known for their durability and eco-friendliness, they work well with natural waxes like beeswax and soy.
7. Wick Centering Devices
Keeping the wick centered while the candle cools is crucial for even burning. Wick centering devices, such as wick bars, clips, or sticks, hold the wick in place, ensuring it stays straight and centered. This is especially important for larger candles, where a slight deviation can cause the candle to burn unevenly or even extinguish itself.
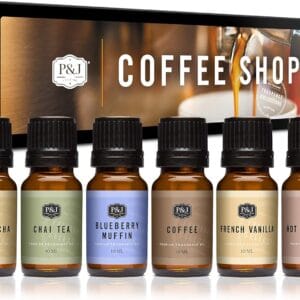
8. Fragrance Oils
Adding fragrance to your candles is what transforms them from mere light sources to mood-setting marvels. Fragrance oils are specifically formulated for candle making and come in a vast array of scents. When selecting oils, consider:
- Concentration: Use oils designed for candles to ensure they mix well with the wax and release a strong scent when burned.
- Temperature: Add the fragrance oil at the right temperature (typically 170-185°F) to ensure it binds properly with the wax.
Start with a few favorite scents and experiment with combinations to create your own signature aromas.
9. Dye
Coloring your candles adds a personal touch and enhances their visual appeal. Candle dyes come in several forms:
- Liquid Dyes: Easy to mix and provide consistent color.
- Dye Blocks: These are solid dyes that you shave into the wax; they’re great for achieving deep, rich colors.
- Powder Dyes: Highly concentrated and ideal for vibrant hues.
Remember, a little goes a long way with dyes. Start with a small amount and add more until you achieve the desired shade.
10. Stirring Utensils
To ensure even distribution of color and fragrance, you need to stir the melted wax thoroughly. Wooden or stainless-steel spoons work best. Avoid plastic as it can melt or leach chemicals into your wax.
11. Heat Gun
A heat gun is a versatile tool in candle making. It’s great for smoothing out the tops of candles, fixing imperfections, or re-melting the surface to embed decorations. It’s also handy for removing air bubbles and ensuring a smooth finish.
12. Labels and Packaging
Once your candles are complete, labeling and packaging them adds a professional touch, especially if you’re gifting them or selling them. Labels should include details like the fragrance, type of wax, burn time, and any safety warnings. For packaging, consider eco-friendly options like recycled paper or biodegradable materials to align with a sustainable brand ethos.
13. Safety Equipment
Safety first, folks! Candle making involves working with hot wax and open flames, so having the right safety equipment is a must:
- Fire Extinguisher: Always keep one nearby, just in case.
- Heat-Resistant Gloves: Protect your hands from hot wax and heated equipment.
- Safety Glasses: Shield your eyes from any splashes of hot wax.
Conclusion
Candle making is a delightful and rewarding hobby that can light up your life (quite literally). With the right tools, you’ll be well on your way to creating beautiful, fragrant candles that add a personal touch to any space. Whether you’re crafting for fun, gifts, or a potential small business, investing in quality equipment will make the process smoother and more enjoyable.
So, what are you waiting for? Gather your supplies, roll up your sleeves, and let your creativity shine through candlelight. Happy candle making!
Feel free to share your candle-making experiences or any tips you might have. What’s your favorite wax or fragrance combo? Have you had any candle-making mishaps that turned into valuable lessons? Let’s light up the comments section with your stories!
Also Read: Getting Started with Candle Making for Beginners – Handmade Candles (candlecreating.com)