Massage candles are the ultimate two-in-one relaxation tool. They provide a soothing aroma while burning, and the melted wax can be used as a luxurious, warm massage oil. Making your own massage candles at home is not only fun but also allows you to customize the scent and ingredients to suit your preferences. Let’s dive into the art of making massage candles with this detailed, step-by-step guide.
Why Make Your Own Massage Candles?
Before we jump into the how, let’s talk about the why. Here are a few reasons why you might want to make your own massage candles:
- Customization: You can choose your favorite scents, colors, and ingredients.
- Quality Control: Ensure all ingredients are natural and skin-safe.
- Cost-Effective: Homemade candles can be more affordable than store-bought ones.
- Personal Touch: They make fantastic, personalized gifts for friends and family.
Ready to start crafting? Let’s get those creative juices flowing!
Ingredients and Supplies You’ll Need
Here’s a handy list of everything you’ll need to create your own massage candles:
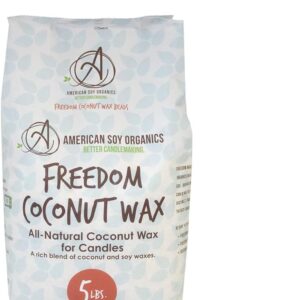
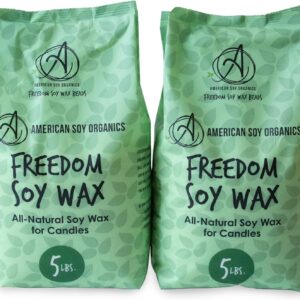
- Soy Wax Flakes: Soy wax is preferred for massage candles because it has a lower melting point, making it safe for the skin.
- Carrier Oil: Options include coconut oil, jojoba oil, or sweet almond oil. These oils help the wax spread smoothly on the skin.
- Essential Oils: Choose your favorite scents for a relaxing aroma. Lavender, eucalyptus, and vanilla are popular choices.
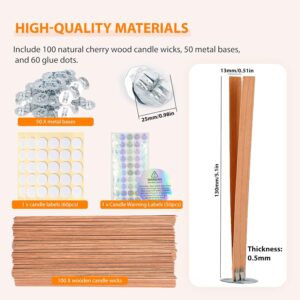
- Cotton Wicks: Make sure they’re lead-free and natural.
- Candle Containers: Heat-resistant containers like small jars or tins.
- Double Boiler: For melting the wax.
- Thermometer: To monitor the wax temperature.
- Stirring Utensil: A wooden or metal spoon works well.
- Measuring Cups and Spoons: For precise measurements.
Step-by-Step Guide to Making Massage Candles
Step 1: Prepare Your Work Area
Set up a clean, clutter-free workspace. Lay down some newspaper or wax paper to catch any spills. Gather all your ingredients and supplies so everything is within reach.
Step 2: Measure the Wax and Oil
Measure out the soy wax flakes and carrier oil. A good ratio is 3 parts wax to 1 part oil. For example, if you’re using 9 ounces of wax, you’ll need 3 ounces of oil. This ratio ensures that the wax melts at a comfortable temperature for skin application.
Step 3: Melt the Wax
Use a double boiler to melt the soy wax flakes. If you don’t have a double boiler, you can create one by placing a heatproof bowl over a pot of simmering water. Stir occasionally to help the wax melt evenly.
Step 4: Add the Carrier Oil
Once the wax is completely melted, add the carrier oil. Stir gently to combine the oil with the wax. This mixture should have a smooth, consistent texture.
Step 5: Monitor the Temperature
Using a thermometer, keep an eye on the wax mixture. The ideal pouring temperature is between 120°F and 140°F. If it’s too hot, it can damage the essential oils, and if it’s too cold, it might not pour smoothly.
Step 6: Add Essential Oils
When the wax mixture is at the right temperature, add your chosen essential oils. The amount will depend on your scent preference, but a general guideline is to use about 30-40 drops per 12 ounces of wax mixture. Stir well to ensure the oils are evenly distributed.
Step 7: Prepare the Containers
While the wax mixture is cooling slightly, prepare your candle containers. Place a wick in the center of each container. You can use a bit of melted wax to stick the wick tab to the bottom or use a wick holder to keep it centered.
Step 8: Pour the Wax
Carefully pour the wax mixture into the prepared containers. Pour slowly to avoid creating air bubbles. Leave a little space at the top of each container.
Step 9: Let the Candles Set
Allow the candles to cool and set completely. This can take several hours, so be patient. Avoid moving the containers while the wax is still liquid to ensure a smooth surface.
Step 10: Trim the Wicks
Once the candles have fully set, trim the wicks to about 1/4 inch. This helps to ensure an even burn and prevents excessive smoke.
How to Use Massage Candles
Using massage candles is a delightful way to enhance relaxation and soothe the skin. Here’s how to get the most out of your homemade massage candles:
- Light the Candle: Ignite the wick and let the candle burn until a pool of melted wax forms around the wick.
- Extinguish the Flame: Blow out the candle and allow the melted wax to cool for a few minutes. The wax should be warm but not too hot to touch.
- Pour the Wax: Carefully pour a small amount of the melted wax into your hands. Alternatively, you can dip your fingers directly into the wax pool.
- Massage into Skin: Gently massage the warm wax into the skin, using slow, soothing motions. The wax will transform into a silky, moisturizing oil as it absorbs.
- Enjoy the Aroma: Inhale the relaxing scent as you continue to massage, letting the aroma enhance the calming experience.
Tips for Safe Use:
- Always test the wax temperature on a small area of skin before full application.
- Avoid using near sensitive areas like the face and eyes.
- Never leave a burning candle unattended.
Using massage candles adds an extra layer of luxury to your self-care routine, providing both aromatic and tactile pleasures. Enjoy the warmth and relaxation!
Tips and Tricks for Perfect Massage Candles
- Test Your Scents: Experiment with different essential oil combinations to find your perfect blend.
- Temperature Matters: Always monitor the temperature to ensure the best results.
- Storage: Keep your candles in a cool, dark place to maintain their quality.
- Safety First: Never leave a burning candle unattended and always blow out the candle before pouring the wax.
Conclusion
Making your own massage candles is a rewarding and enjoyable DIY project. Not only do you get to customize the scent and ingredients, but you also create a unique product that enhances relaxation and self-care. Whether you’re making them for yourself or as gifts, these massage candles are sure to bring warmth and comfort to any occasion. So, gather your supplies, unleash your creativity, and start crafting your way to a more relaxed, aromatic life. Happy candle-making!
Also Read: DIY Firestarter Candles: Crafting Flames with Flair – Handmade Candles (candlecreating.com)