Ever wanted to add a touch of elegance and magic to your home decor? Floating candles are the perfect way to achieve that serene ambiance. These charming little lights can transform a simple bowl of water into a stunning centerpiece. Whether you’re planning a romantic dinner, a relaxing bath, or a festive party, floating candles are your go-to decor item. And the best part? You can make them yourself! So, let’s dive into the wonderful world of DIY floating candles.
Materials You’ll Need
Before we get started, let’s gather all the materials you’ll need. Don’t worry, you won’t need a dragon’s hoard of supplies, just a few simple items that you can easily find at your local craft store or online.
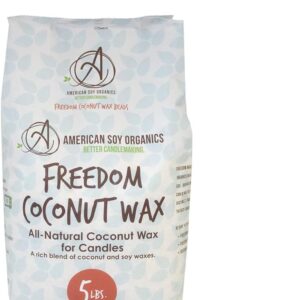
- Soy Wax or Paraffin Wax: Soy wax is eco-friendly and burns cleaner, while paraffin wax is cheaper and more readily available.
- Candle Wicks: Pre-waxed wicks with metal sustainers are ideal.
- Wick Sustainers: These help keep the wick centered and upright.
- Fragrance Oils (Optional): For a pleasant aroma.
- Candle Dye (Optional): To add a splash of color.
- Molds: Silicone molds work best, but you can also use metal molds or even ice cube trays.
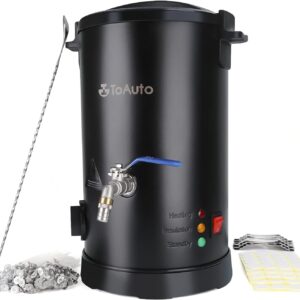
- Double Boiler or Microwave-Safe Container: For melting the wax.
- Thermometer: To monitor the wax temperature.
- Stirring Stick: A wooden spoon or popsicle stick will do.
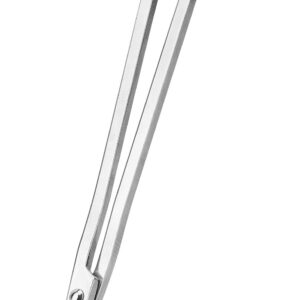
- Scissors: For trimming the wicks.
- Container of Water: To test your floating candles.
Step-by-Step Instructions
1. Preparing the Work Area
First things first, make sure your work area is clean and well-ventilated. Cover your workspace with newspaper or an old cloth to catch any spills. Safety first, folks!
2. Melting the Wax
- Double Boiler Method: If you’re using a double boiler, fill the bottom pot with water and bring it to a simmer. Place the wax in the top pot and let it melt slowly. Stir occasionally to ensure it melts evenly.
- Microwave Method: If you prefer using a microwave, place the wax in a microwave-safe container. Heat in short bursts of 30 seconds, stirring in between until the wax is fully melted.
3. Adding Color and Fragrance
Once your wax is melted, it’s time to add color and fragrance. This step is optional, but it adds a lovely touch to your candles.
- Color: Add a few drops of candle dye to the melted wax and stir well. Remember, a little goes a long way!
- Fragrance: Add a few drops of fragrance oil and stir. The amount you need depends on the strength of the scent you desire. Start with a small amount and add more if necessary.
4. Preparing the Molds
While the wax is melting, prepare your molds. Place the wick sustainers in the center of each mold. If your molds are deep, you can use a skewer or pencil to keep the wicks centered and upright.
5. Pouring the Wax
Carefully pour the melted wax into the molds. Leave a little space at the top, as the wax will expand slightly as it cools. Allow the wax to cool and harden completely. This can take a few hours, so be patient.
6. Releasing the Candles
Once the candles are completely hardened, gently remove them from the molds. If you’re using silicone molds, this should be easy. For metal molds, you might need to tap them gently to release the candles.
7. Trimming the Wicks
Trim the wicks to about 1/4 inch above the surface of the candle. This helps ensure a steady, even burn.
8. Testing the Candles
Fill a container with water and place your candles in it to see if they float. If they do, congratulations! You’ve successfully made floating candles. If not, check that the base is flat and adjust as needed.
Tips and Tricks
- Use Smaller Molds: Smaller candles tend to float better. Think about using molds that are about 1-2 inches in diameter.
- Experiment with Shapes: Don’t limit yourself to round candles. Experiment with different shapes and sizes.
- Layering Colors: For a unique look, pour the wax in layers, allowing each layer to cool before adding the next. This creates a beautiful striped effect.
- Storage: Store your floating candles in a cool, dry place to prevent them from melting or warping.
Fun Ideas for Using Floating Candles
Floating candles aren’t just for romantic dinners (though they do add a certain je ne sais quoi to a date night). Here are some creative ways to use your handmade floating candles:
- Outdoor Parties: Create a magical atmosphere for your backyard party by placing floating candles in a birdbath or pool.
- Bath Time Bliss: Turn your bath into a spa-like retreat by adding a few floating candles.
- Holiday Decor: Use red and green candles for Christmas, or orange and black for Halloween.
- Wedding Decor: Floating candles make for elegant and budget-friendly wedding centerpieces.
- Meditation and Relaxation: Create a calm and serene environment for your meditation practice.
Troubleshooting Common Issues
Even with the best-laid plans, sometimes things can go awry. Here are some common issues and how to fix them:
- Candles Don’t Float: Ensure the base is flat and the candles are small enough. If they still don’t float, the wax might be too dense. Try using a lighter wax or adding a small amount of paraffin.
- Uneven Burning: Make sure the wick is centered and trim it to 1/4 inch before lighting.
- Cracks in the Wax: This can happen if the wax cools too quickly. To prevent this, cool the candles at room temperature away from drafts.
Frequently Asked Questions
Q: Can I use essential oils instead of fragrance oils?
A: Yes, but be cautious. Some essential oils can cause the wax to become unstable. Start with a small amount and test a candle to see how it burns.
Q: How long do floating candles burn?
A: It depends on the size of the candle and the type of wax used. On average, small floating candles burn for about 4-5 hours.
Q: Can I reuse the wax from old candles?
A: Absolutely! Just melt down your old candles and remove any debris before pouring the wax into molds.
Q: Are floating candles safe?
A: Yes, as long as you follow basic candle safety rules. Never leave burning candles unattended and keep them away from flammable materials.
Q: Can I make floating candles without molds?
A: It’s possible, but molds help achieve a consistent shape and size. If you’re feeling adventurous, you can try shaping the candles by hand, but be prepared for a less polished look.
Conclusion
Making floating candles is a fun and rewarding DIY project that adds a touch of magic to any setting. With a few simple materials and a bit of creativity, you can create beautiful candles that float gracefully on water, enhancing the ambiance of your home or event. So, why not give it a try? Light up your life with the enchanting glow of floating candles and bask in the warm, inviting atmosphere they create.
And there you have it, folks! A comprehensive guide to making your very own floating candles. Now, roll up those sleeves and get crafting. Your inner candle maker is waiting to shine! 🌟
Did you enjoy this guide? Have any tips or tricks of your own for making floating candles? Share your thoughts and experiences in the comments below. Happy candle making!
Also Read: How to Make Floating Candle Centerpieces – Handmade Candles (candlecreating.com)